
Note: This process is optional.
Imagine a situation (a disaster), where the virtual infrastructure needs to be restored from scratch. Everything is lost, except the backup files are available on a (Hardened) Repository in the disaster site or in the Capacity Tier of a Scale-out Backup Repository. Imagine that not even a configuration backup is available.
This blog describes how to do recover your data in five steps.
Step 1: Install Veeam Backup & Replication
Go to Veeam.com and download Veeam Backup & Replication. The latest version is backwards compatible and can read backup files created with earlier versions. To install Veeam Backup & Replication, follow the installation instructions. Going with the default settings is fine for a restore and for most other situations.
Having the license file available is recommended (it can be downloaded from my.veeam.com). If there are private hotfixes that are important for your environment, then a valid license is required. While the Community Edition (no license) is fine for most kinds of restores, it cannot be used with private hotfixes.
Step 2: Add a virtual infrastructure
After Veeam Backup & Replication is installed, open the console and add the virtual infrastructure (Backup Infrastructure -> Managed Servers -> Add server). The following steps depend on your hypervisor.
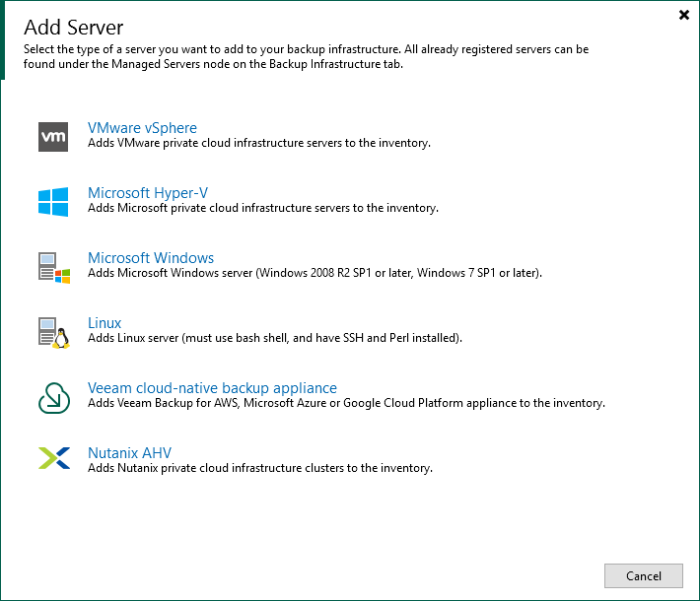
Step 3: Veeam backup proxies
While we want to restore, it’s a good idea to add some backup proxies for better performance. For Hyper-V, there is nothing to do. On-Host proxies work fine for restores.
The fastest restore option for VMware is having dedicated backup proxies (otherwise the backup server will be used). Except for restores to NFS, Hot-Add proxies are usually the fastest way for a full VM restore. Proxies for VMware can be Linux or Windows machines. Both options work similar. For virtual proxies, it’s recommended to have less vCPUs than the physical processor(s) in the ESXi host has CPU cores. Follow the user guide to add VMware backup proxies.
One proxy also needs to be deployed for Nutanix AHV environments. The deployment of Nutanix proxies happens directly from the Veeam Backup & Replication server. The user guide has step-by-step instructions.
Step 4: Add Veeam backup repositories
Before a restore is possible, the backup repository/repositories with the backup data needs to be added to Veeam Backup & Replication. The user guide describes this process for all different types of repositories. For Hardened Repositories, make sure that SSH access is enabled temporary to be able to add the Hardened Repository Linux server with single-use credentials.
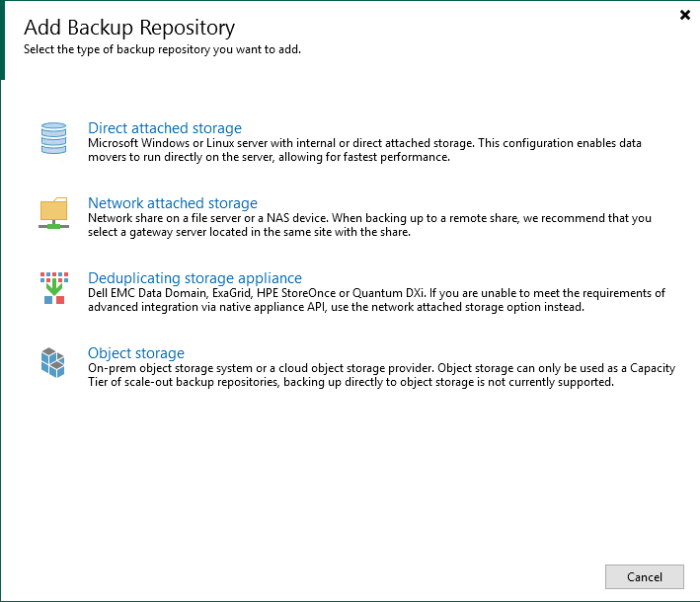
Once the repository is added, rescan it to import the backups. After import, backups are available in Home -> Backups -> Disk (imported).
If the backups are only available in object storage of a former Capacity Tier of a Scale-out Backup Repository, then there are two options.
- Add object storage as a repository and import the backups. This also works with Veeam Backup & Replication Community Edition.
- Create a Scale-out Backup Repository and add the object storage as a Capacity Tier. Make sure that no other Veeam backup server is accessing the object storage. Access by multiple Veeam backup servers to one object storage can cause data corruption!
The backups are available in Home -> Backups -> Object Storage (Imported) and restore is possible directly. In case of option 2, it’s possible to download the backups before restoring.
Step 5: Start restoring
Go to Home -> Backups and start restoring by right-clicking on the backups. Instant recovery streams VMs directly from the backup repository to the virtual infrastructure. The repository acts as a datastore for the virtual environment. Veeam invented that more than a decade ago and improved it since then.

The performance of instant recovery depends on the backup storage hardware. If many or highly transactional VMs need to be restored, then a “Restore entire VM” option is usually best as it offers production storage performance.
Summary
With five easy steps, it’s possible to restore with Veeam Backup & Replication after everything except the backup files are lost. If there’s no hardware available to restore to, then restoring to Amazon EC2, Microsoft Azure or Google Compute Engine is also easy to do with Veeam Backup & Replication.