
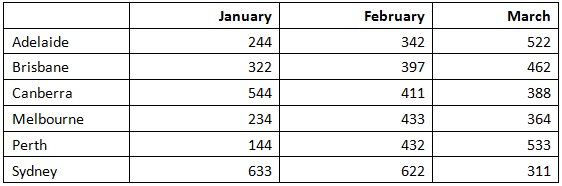
The ability to create a table in Word allows users to present content on the page in a column and/or row format. Many users associate a table with the “ever so obvious” layout where borders are displayed. Whilst this is a perfect way to utilise tables, tables can do so much more. Below is a perfect example of a basic table with borders displayed.
Think outside the box and turn off the borders and you have an invisible way of positioning your content on the page.

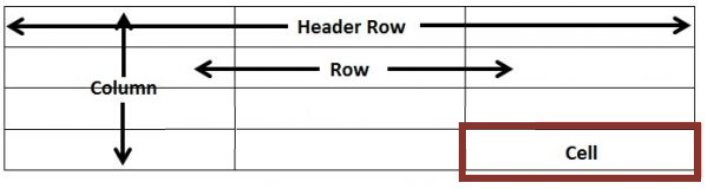
Table Terminology
When working with tables it is useful to know the correct terminology. Below are four (4) common terms used when working with tables.
Navigating a Table
Moving around or navigating in a table is very easy. You can use the mouse and click inside each cell you wish to add content to, or if you prefer the keyboard you can use the arrow keys to move up, down, left and right or the TAB key will move the cursor to the next cell.
If you position your mouse cursor in the very last cell of the table and press the TAB key on the keyboard, a new row will be created.


How to make a table in Word
So now that you have an idea of tables and what they can do, let’s see how to make a table in Word.
- Open Microsoft Word
- You will now have a new blank document
- Press the Enter key a few times to insert a few blank lines
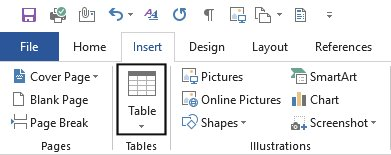
- Click the Insert tab from the Ribbon
- Select Table from the Tables group
- The Insert Table menu will appear allowing you to select how many rows and columns you wish to insert:

- Hover your mouse cursor over the grid and you will see the grid will light up to show how many rows and columns you will select and at the top of the grid it will also tell you how many you have selected
- Position your cursor so you have 3 rows and 3 columns
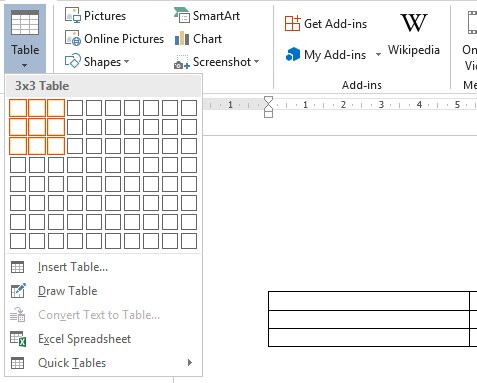
- While still hovering, take a look at your document, you will see a live preview of what your table will look like on the page, this is another way to can check that you are selecting the correct number of rows and columns
- Click once with the left mouse button and the table will now be inserted into the page

- You will now see you have 2 additional tabs available on the Ribbon called Table Tools > Design and Table Tools > Layout
- These two tabs are only visible when you have your mouse cursor inside a table. I often find during training that people lose the Table Tools tabs and cannot get them back so it’s important to remember that they only appear when the object they relate to is selected
Entering text or images
Once you have inserted a table in your document, it is time to add content. You can add text or images in the same way that you would into an empty document. Click the cell you want to add text to and type in the information.
The more information you add to each cell, the larger the cell will grow in height. Remember that if you enter information into one cell within a column and nothing into the next cell, the column containing no content will still grow to match the cell(s) adjacent to it. The height of your rows, or indeed the entire table, will be the same as the tallest cell.

In future posts I will demonstrate how to customise your tables including applying custom cell or table styles; how to draw tables or cells manually; insert and delete rows and columns; merge or split cells; making rows, columns, and cells evenly spaced, and much more.
Reference: https://www.thetraininglady.com/create-basic-table-word/