
Many users have discovered the amazing conditional formatting functions available in Excel, but not many know that you can also use conditional formatting in Outlook.
This feature allows you to specify rules based on your incoming email messages so that you can change the formatting as they arrive. Want to make all emails from “Bob” go green on arrival? No problems.
Maybe you’d like any email which contains a specific word in the subject to be highlighted in red?
What if you receive email for multiple email accounts and you’d like emails sent to a specific email address to stand out?
Conditional formatting is actually already being applied within Outlook. It’s the reason that new emails appear in bold blue font. Don’t like the default style for unread messages? You can change it via conditional formatting.
The other thing to remember is that conditional formatting in Outlook is applied to each “view”. Each folder within your mailbox has the ability to be customised. This can include changing which columns are displayed, the sorting order being used, and you can even apply filters within a view.
When you create a conditional format, you are apply that formatting to the view you are currently editing. If you want the same formatting to apply across multiple folders or locations in Outlook then you will need to create the rule separately in each view.
Create a new conditional formatting rule in Outlook
- Open Microsoft Outlook
- Click the View tab on the Ribbon
- Choose View Settings

- The Advanced View Settings dialog box will appear.
- Click the Conditional Formatting button:

- The Conditional Formatting window will appear.
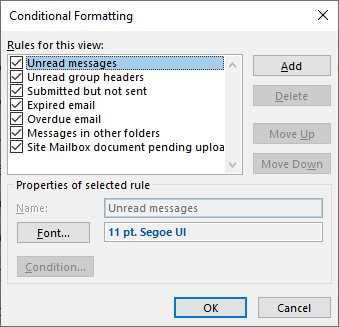
- We are going to create a brand new format so click the Add button
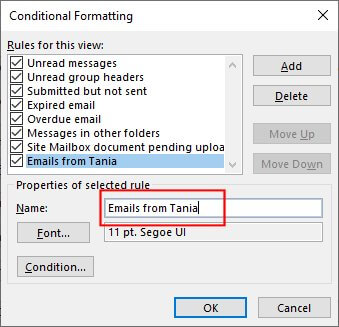
- Add a Name for the new formatting rule
- Now we need to specify the Font styling we want to use.
- Click the Font button.
- Choose the Font, Font style, Size and Color options you would like to use.

- Click OK.
- Now click the Condition button so we can specify “who or what” this formatting should be applied to:
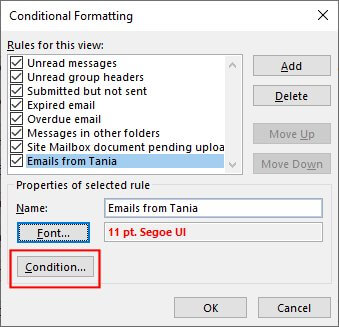
- The Filter window will appear

- I want this formatting to apply when any email is received from “Tania Smith”.
- I can click the From button and find Tania in my address book.
- As you can see there are lots of different criteria options you can set to be specific about where this formatting should be applied.
- Once you are happy with the condition you have specified, click OK.
- Click OK x 3 to finish and close each of the separate windows until you can see your Inbox again.
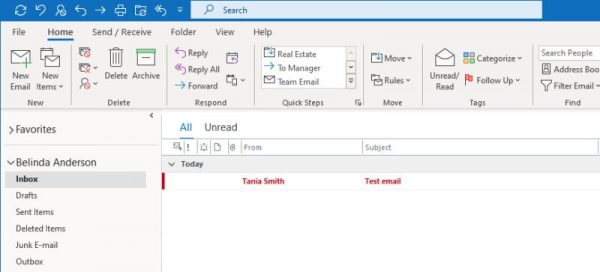
- Now to test out my formatting I have asked Tania to send me a test email.
- When the test email arrives into Outlook, my conditional formatting kicks in and formats the email with red text and bold font.
I hope this has given you a great introduction to the use of conditional formatting in Outlook. Go and experiment with some of the other condition options to see just what is possible with this feature.
Reference: https://www.thetraininglady.com/conditional-formatting-outlook/